The EASY Way to Stain Finished Wood with Gel Stain
Here is your step by step tutorial for how to stain finished wood using gel stain. This is an easy DIY home project and easy home update that anyone can do! If you’re looking to update or stain finished wood, keep reading!
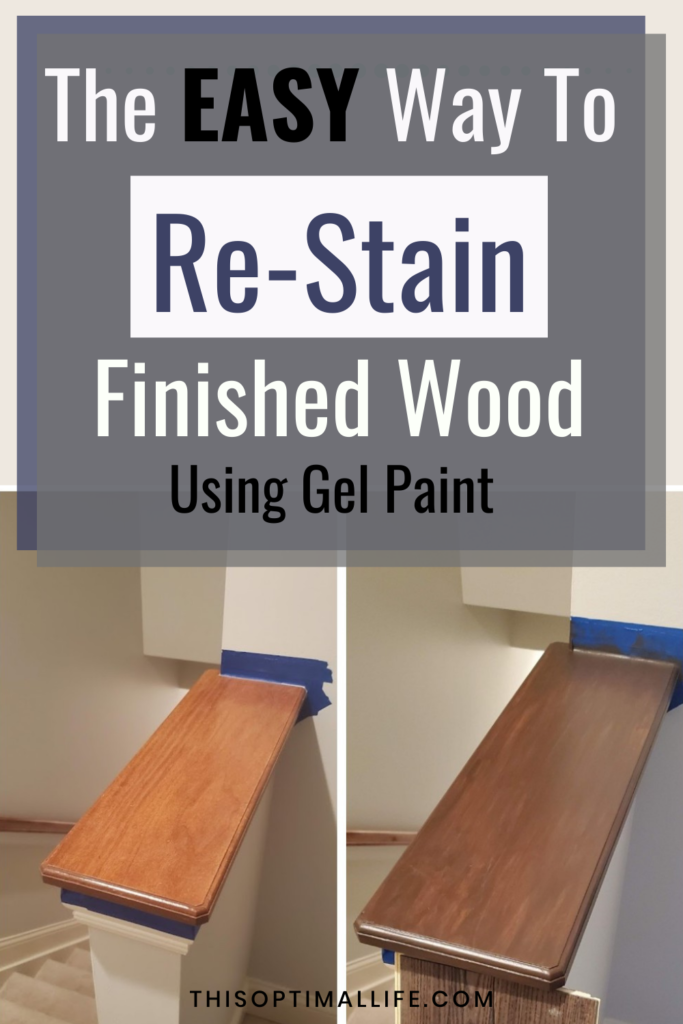
Looking to update the wood finishes in your home? I used to think the only way to do this would be to go nuclear: paint it all white or black, or even just completely replace it. Then I discovered you can actually re-stain finished wood using Gel Stain to change the color up. AND it is actually a pretty simple process that even a beginner (like me) can handle!
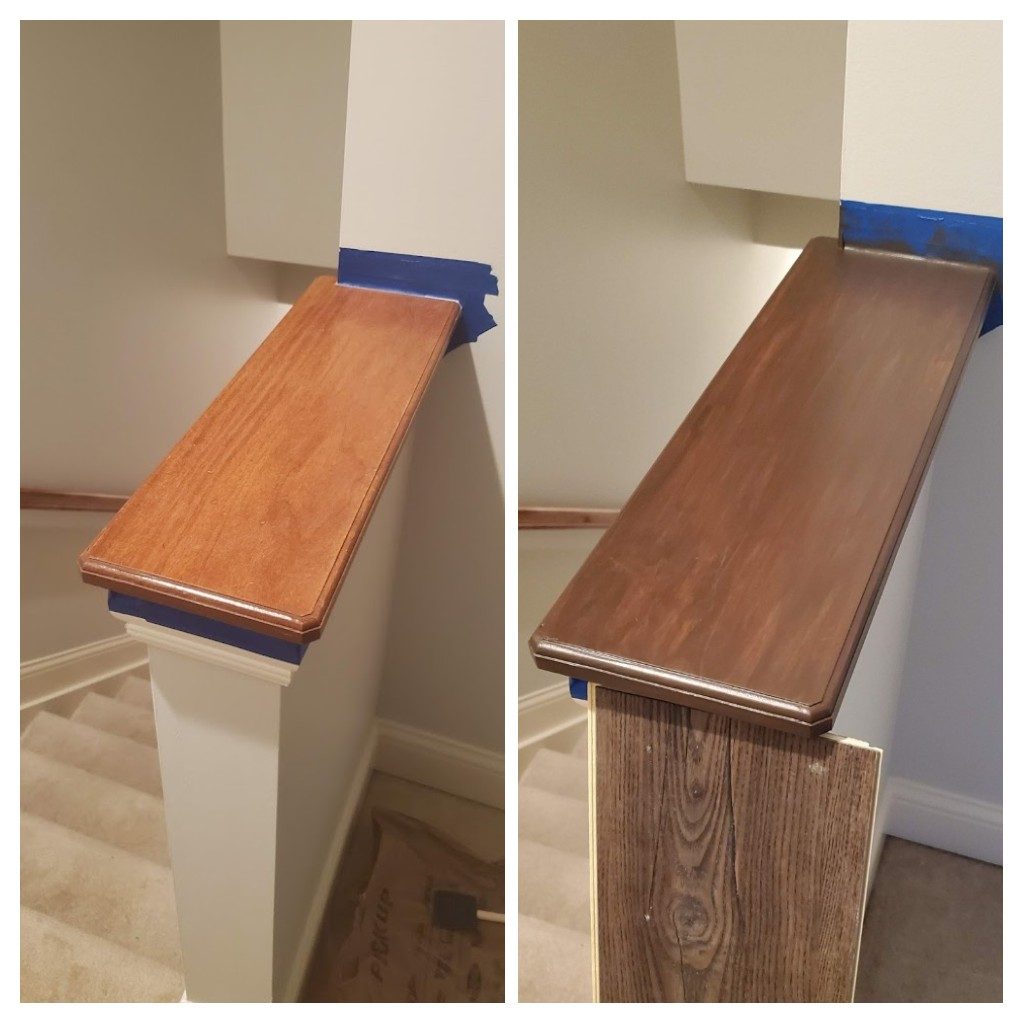
Here is the wood tone I was starting with:
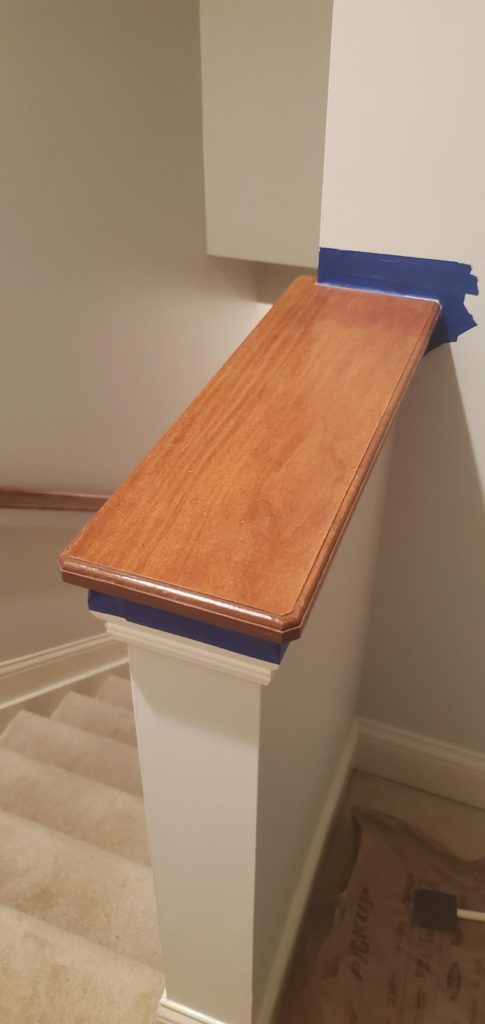
Not terrible, but definitely on the orangey side. I wanted to make it a little darker to better coordinate with the dark wood flooring we have on our first floor.
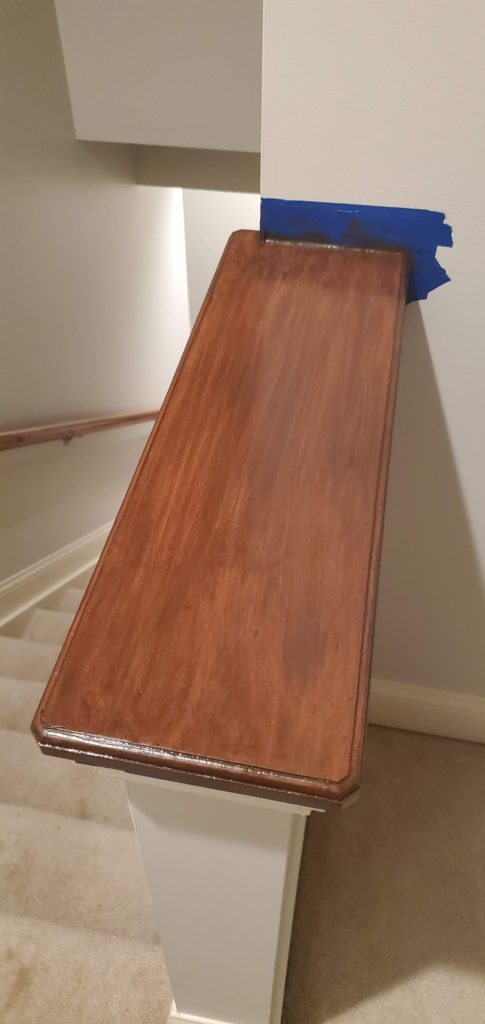
Now, one thing to realize is that the color will be a little stronger (or maybe thicker) than you might expect. Gel stain is really almost a paint-like material. It’s thick and opaque. If you want to subtly darken up the wood in your home, you’ll need to use very light layers of this stain until you reach your desired color. Even then, it still might look a little more like paint than how a normal wood with a dark stain would look. This product works really well if you’re going for an espresso shade especially. I love how it turned out and think it was a huge upgrade over the orangey wood I color I started with.
Here is what you’ll need to Stain Finished Wood with Gel Stain
- Mineral Spirits
- 220 Grit Sanding Paper or Block
- Tack Cloth
- Painters tape
- Foam Brushes (2 inch should work)
- Latex Gloves
- Old rags or T-Shirts
- General Finishes Gel Stain (I went with the Antique Walnut finish)
- Minwax Wipe-On Poly in Satin
Step by Step Instructions for using Gel Stain
- First thoroughly clean the areas you are going to be staining using Mineral Spirits and a rag. Depending on how grimy the area is, you may need to do this multiple times. It may even require a scouring sponge to get really clean. Make sure you don’t skip this step, it is important that the surface is as clean as possible so that your stain will not chip off!
- Now, using the 220 grit sandpaper or block, lightly sand the area. Don’t go overboard here! You just want to rough it up a little to give the stain something to stick to. Clean off the extra dust using your tack cloth.
- Before you start staining, you may want to tape off any areas that you don’t want to get stain on.
- Now for the fun part – actually applying the stain. I wanted to go slowly and apply super light layers to make sure I didn’t accidentally go too dark. Stir your gel stain first, then use your foam brush to apply a small amount of stain to the area. Spread it around the area, then use a rag or t-shirt to spread it out over the entire space.
- The lighter you want it to be, the more you should wipe off with the rag. If you’re going for a darker, more solid color, leave more stain on.
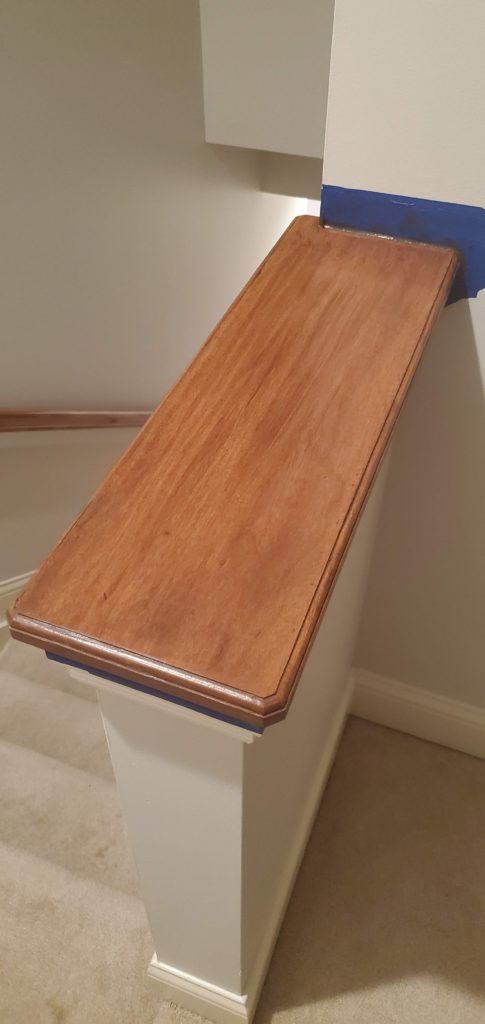
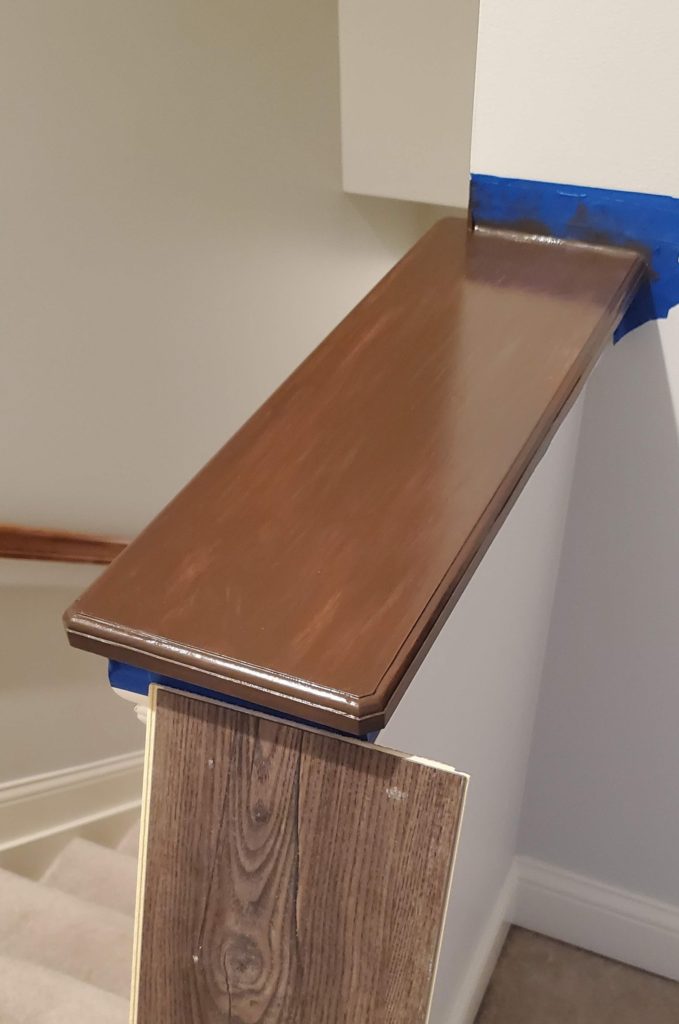
- See below for the coats I applied to get an idea of what each coat looked like. I ended up going with 3 coats of gel stain.
- See below for the coats I applied to get an idea of what each coat looked like. I ended up going with 3 coats of gel stain.
- Let the gel stain dry for at least 12 hours, then repeat additional coats as necessary until you reach your desired color.
- Once you’ve reached your desired color and it has completely dried (AT LEAST 12 hours later), apply a very thin coat of Wipe-On Poly using another foam brush.
- Let it dry for at least 5 hours, then apply another coat of Wipe-On Poly. Apply at least 3 coats total.
And that’s it! I was able to complete this small area over the course of 5 days, maybe 15 minutes or so per day. It was super easy and was a great way to test out this method before trying something a little larger (like my banister).
I LOVE the way it turned out!
Here are some pictures of the process that show what it looked like with each coat of gel stain.
For more gel stain projects, check out this post for how I used gel stain to stain a butcher block countertop for our laundry room.
This post contains affiliate links. As an Amazon Associate, if you buy through these links I may earn a commission at no extra cost to you.
